

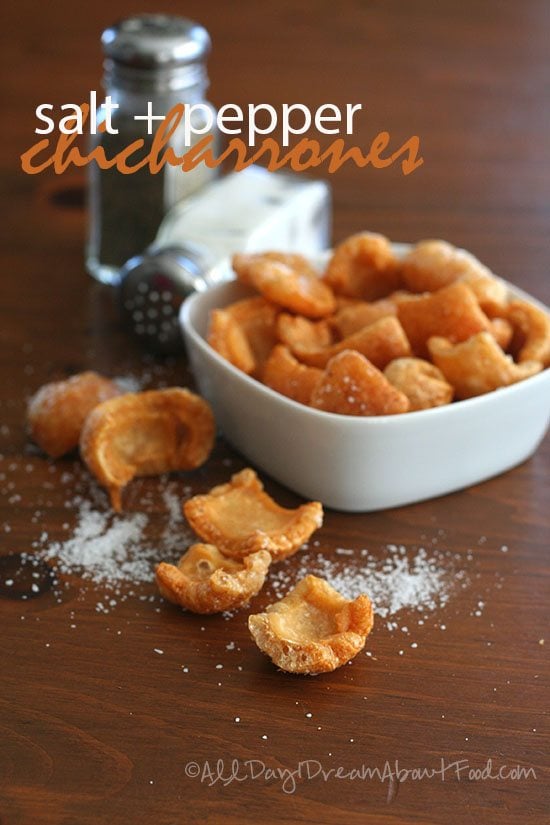
Homemade chicharrones, or pork rinds, are a healthy and flavorful low carb snack without the additives or hydrogenated oils. The ultimate keto and paleo snack!
It’s funny to think that I am posting a recipe for homemade chicharonnes, when the very thought of them used to freak me out. It was in my younger, more squeamish days, and may have something to do with being chased around by a college friend with a dried pig’s ear he’d purchased for his dog. I was mildly traumatized.
Many store-bought brands still freak me out, what with all the additives, MSG, hydrogenated oils and other unmentionables. But there are some good brands now like Epic and Meat 4505, among others. And having tasted some freshly-made chicharrones at a few restaurants, I no longer tar them all with the same brush. Pork rinds are being elevated from their junk food status into a true delicacy. I have overcome my distaste for them and you will be glad I did. Because I have been experimenting in the kitchen and can honestly say that homemade chicharrones are a delicious and healthy keto snack. And they really aren’t that hard to make either. So let’s get cracklin…
How To Make Chicharrones
Get yourself some pig skin:
The hardest part of the whole process is sourcing the pork skin. I couldn’t find pork skin for love nor money at any regular grocery stores in my vicinity and was considering purchasing pork belly at a local Asian market because it often comes with the skin still attached. But this was a much pricier option and it went against my waste-not-want-not nature. Knowing that many butchers are simply throwing back fat and skin away since there is so little demand for it, I was sure I could find a better solution.
With the growth of small scale farming that focuses on grassfed and pasture-raised meats, it’s easy hit up one of your local farms for some pig skin. In the Portland area, it’s pretty easy to connect with one of these farms at one of our many markets, and many of the farmers will give it to you practically for free. They are just happy to see someone take something that usually goes to waste. Although around these parts, in this food-centric city, I am sometimes facing some stiff competition from local chefs and other foodies. I can also purchase it at a local pig-focused butcher called Tails and Trotters. If you can’t find a local pig farmer to connect with, there are now a number of places where you can purchase it online. Just google “where to buy pig skin for cooking” and I promise you will find a few places.
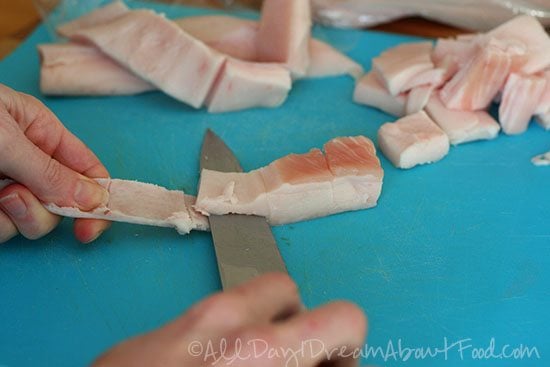
Cut off most of the fat:
Once I had some pork skin in hand, I was off to the chicharrone races. My first attempt was tasty but I wouldn’t call it a success. I left far too much of the fat on the skin, having read that it was fine to do so. This appealed to me in part because it eliminated the extra work of cutting the fat off the skin, but also because I thought it would be tastier.
It is not fine to do so, however, since when you go to fry the pork rinds, the fat puffs up into something resembling a pillow and floats with the pork skin on top. It’s like a little life jacket for each piece of pork skin, rescuing it from drowning in the hot oil. Your pork skin won’t sizzle and get all crispy, but instead become hard and impossible to chew and the only part you will be able to eat is the fatty pillow attached to the skin. Which is delicious, by the way.
Cut the skin into pieces:
It wasn’t until my third attempt that I nailed down the process and ended up with perfectly crispy chicharrones. You really do need to remove the majority of the fat from the skin, and it’s not as hard as it appears. Cutting the skin into long strips about 2 inches wide made the removal more manageable. I then scored the fat and the slid a sharp knife (really sharp knife, so get out that knife sharpener!) under the first piece of fat. Once that was removed, I could use that part of the skin to hold onto and slide my knife easily under the remaining pieces of fat (see photo below). From there, I could cut my strips of skin into 2 inch pieces.
Save the fat!
This leaves you with a lot of cubed fat and most recipes will tell you to discard it. Don’t you DARE! That is good stuff and super healthy if you’ve managed to procure some pasture-raised pork skin. You can do a number of things with it, including making sausage, rendering your own lard (healthy lard!) and even using it to fry the chicharrones themselves. In fact, many recipes I came across have you frying the chicharrones in lard and why not fry it in its own lard instead of the hydrogenated store bought variety? This last time, I cubed the fat and froze about half of it for future sausage making, and then rendered the rest and used it to fry the chicharrones. It wasn’t quite enough lard, so I added some cooking oil (grapeseed) to top it up.
Dry out the skins:
When I started investigating making my own pork rinds, I saw any number of methods and some of them were quite laborious. Hours of boiling in water to render off the fat and soften the skin and then another hour of boiling in hot oil until they puff up and become crispy. I was beginning to think I really didn’t want to make them at all when I came across this recipe for Cuban Chicharrones. It offered me a choice of two methods, one of which meant I could turn on my oven at a low temperature for several hours and leave the skins to their own devices.
Fry them up!
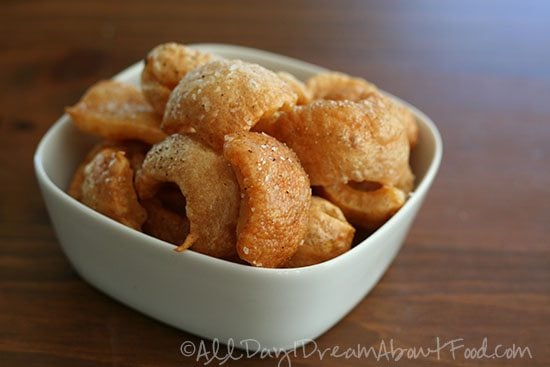
Once they were sufficiently dried, I could then fry them up to cracklin’ perfection. It worked beautifully and I wouldn’t make them any other way.
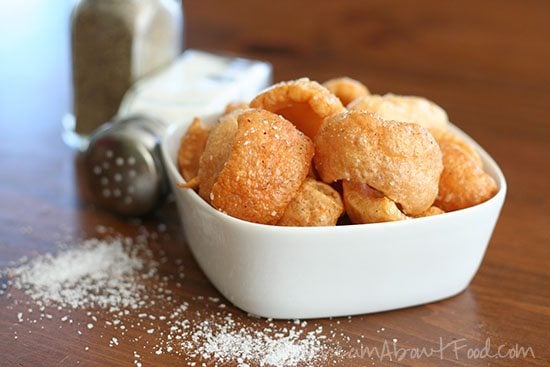
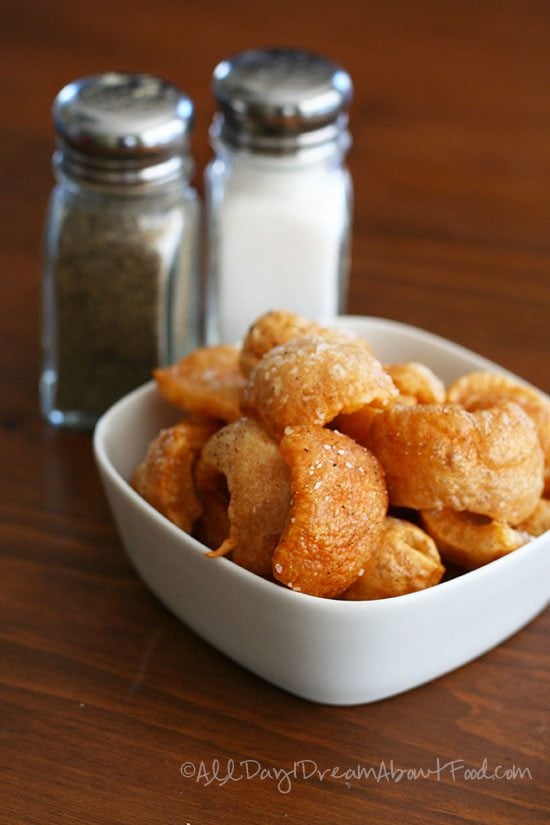
As for flavourings and seasonings, you have so many great choices. I’d say the best approach to adding flavour is to wait until the crispy skins come out of the hot fat, and then toss them immediately with any spices then. For now, I am just enjoying the flavour of the chicharrones all on their own, enhanced only be a little salt and pepper.
Keto Pork Rind Recipes
These days, there are so many great ways to use chicharrones for other recipes. Check out these fun ideas!
Pork Rind Tortillas from The Primitive Palate
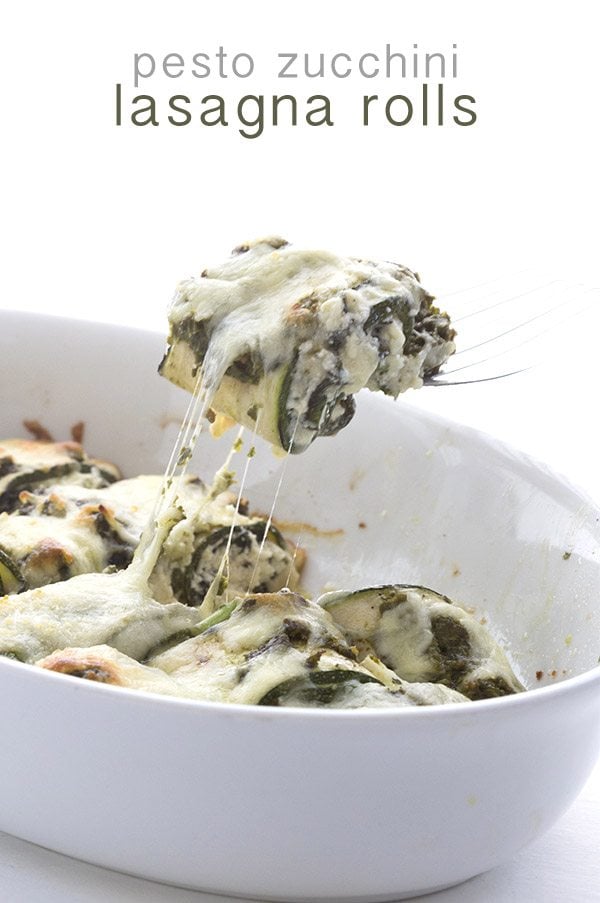
Oven Fried Zucchini Fries from Sugar-Free Mom
Keto Chicken Piccata Meatballs
Cheesy Crab Bites from It’s Yummi
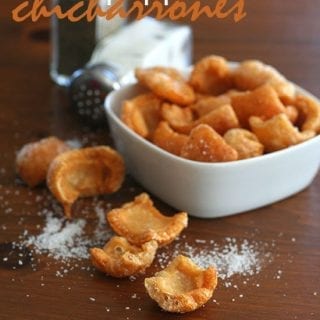
Homemade Chicharrones
Ingredients
- 3 to 5 lbs pork back fat and skin
- Extra cooking oil or lard, if needed
- Sea salt to taste
- Pepper to taste
Instructions
- Preheat oven to 250F and set a wire rack over a baking sheet.
- Using a very sharp knife, cut pork skin and fat into long strips, about 2 inches wide. Score the fat on each strip every two inches. Insert knife carefully between skin and fat on one end of the strip and remove a portion of the fat (you will end up with a thin layer of fat still on the skin and that is fine).
- Once that first part of fat is removed, you can hold the skin in one hand as you slide the knife down the strip to remove the majority of the fat. Again, a little fat still clinging to the skin is okay.
- When the fat has been removed, cut each strip into 2 inch squares and place, fat-side down, on wire rack.
- Bake 3 hours, until skin is completely dried out.
- Meanwhile, if you want to use the pork fat to cook your chicharrones, place it in a large saucepan over medium low heat. Cook gently until most of the fat has liquified, about 2 hours. This is also the same way you can render lard for future cooking use. Use a slotted spoon to remove any remaining solids. Discard (or eat, they taste like bacon and are great on salad!).
- When baking time is up, heat oil/lard to a depth of 1/3 in the pan. Or you can just have a few inches of oil and can cook your pork rinds in batches. Oil should be quite hot but not bubbling.
- Add pork rinds and cook until they bubble and puff up, about 3 to 5 minutes. Remove and drain on a paper towel-lined plate. Sprinkle immediately with salt and pepper.
Notes
Nutrition
Nutritional Disclaimer
Please note that I am not a medical or nutritional professional. I am simply recounting and sharing my own experiences on this blog. Nothing I express here should be taken as medical advice and you should consult with your doctor before starting any diet or exercise program. I provide nutritional information for my recipes simply as a courtesy to my readers. It is calculated using MacGourmet software and I remove erythritol from the final carb count and net carb count, as it does not affect my own blood glucose levels. I do my best to be as accurate as possible but you should independently calculate nutritional information on your own before relying on them. I expressly disclaim any and all liability of any kind with respect to any act or omission wholly or in part in reliance on anything contained in this website.
Free Bonus: Secrets to Keto Baking!
Sign up for your favorite recipes delivered straight to your inbox plus get our FREE bonus: Secrets to Keto Baking!


Thank you for doing the hard testing process! This was so easy to accomplish and they turned out amazing!! Wish I could post a picture!
Wow! I can’t believe it actually worked!!!!!! So cool! Thank you SO much!!!!! Mine did take only 2 1/2 hour to dry, perhaps depending on the oven – mine has a fan. So excited!