
When I first started making my own yogurt, the results were inconsistent. At times, I would end up with a nice, thick product, and at others, it would be thin and runny. But over the course of the past 7 months, I’ve figured out a few tricks to get the thick, creamy quality we love almost every time. Some of these tricks were discovered through experimenting with ingredients and procedure, and some I stumbled upon purely by accident. But I am more than happy to share them with you in the hopes that they help you make better yogurt.
You can read about the basic procedure from my original post, but for quick reference, it goes something like this: pour half a gallon of milk (any % milkfat) into a crockpot, turn crockpot on high and leave for 2 1/2 hours. Then turn crockpot off, and leave for another 3 hours. Whisk 2 cups of the hot milk into 1/2 cup storebought yogurt, and then stir back into crockpot. Wrap the whole crockpot in large bath towels and let sit for 8 hours. Simple enough, but it does not always guarantee that you get great results. So, on to my best practices.
1. Use Quality Ingredients This may seem like a no-brainer, but it is very important to the end result. And by “quality”, I don’t necessarily mean more expensive. What you are looking for in a storebought starter yogurt is something with live active cultures and no fillers like gelatin to thicken it. I have found that both Stonyfield and my local Stop And Shop generic brand work well. Dannon, Yoplait and Shaw’s generic brand do not.
Once you have made your own yogurt once, you can use some of it as your starter culture. But about every 6 times making it, you need to start afresh. So it is important that your storebought yogurt be thickend primarily by the live active cultures, and not added milk proteins or gelatin.
2. Take Your Temperature The basic process of crockpot yogurt relies purely on time it to heat up the milk and cool it back down, and it doesn’t take into account how warm or cool the surrounding environment might be. To achieve more consistent results, I started using a thermometer to find out what temperatures worked best. I actually use an instant-read meat thermometer, as my old candy thermometer wasn’t giving me accurate readings. I’ve found that the best temp for adding in the starter yogurt without killing off all the live cultures was about 116F. Now I use that to my advantage. If the milk is too hot, I let it cool down and if it’s too cool, I turn the crockpot back on for a bit to reach the ideal temperature.
3. Reheat At the three hour mark, when the starter yogurt is added to the mix in the basic method, the crockpot itself is cool to the touch. The live bacterial cultures need to stay at the ideal temperature for a while in order to reproduce and spread, thus thickening the yogurt. To aid this process, I began turning my crockpot BACK on for 4-5 minutes after adding the starter yogurt. This allows the outer metal part of the crockpot to heat up without significantly warming the inner ceramic pot and the milk-yogurt mixture. That way, when I wrap it up in the heavy bath towels, there is some heat remaining for the towels to insulate.
4. Give It More Time This is the trick I discovered purely by accident. I’d prepared some yogurt in the morning with the intention of unwrapping it from its towels in the evening, at the requisite 8 hour mark. But I forgot about it and went to bed. The next morning, I frantically unwrapped it, not sure what I would find. Lo and behold, I found the thickest, richest yogurt I’d made to date. Since that happy accident, I have been leaving my yogurt to incubate for at least 12 hours every time. And every time, I get a thick, rich, creamy yogurt to serve my family.
5. Greek Yogurt Tip If you are looking to make greek yogurt, a particular favourite of mine, my best tip revolves around the straining. I was using coffee filters for quite a while but I didn’t like the waste of them. So I took an old t-shirt of my husbands and cut it up so that I had a single layer of thickness with which to line the sieve. And happily, this works quite a bit better. The t-shirt material soaks up more of the whey from the yogurt and it thickens quite a bit faster than with coffee filters. A tea towel would likely work as well.
The truth of the matter is that the basic crockpot yogurt method should only be used as a guide. Sticking too rigidly to times for heating and cooling the milk means that you get inconsistent results. It is far more important to get the temperatures right and to allow the yogurt to incubate for longer. This actually means that, if you are in a hurry or you are impatient, you can circumvent the crockpot timing altogether. You can heat the milk up faster if you put it in a saucepan until it hits 180F and then pour it into the crockpot (I did this once when I discovered I’d forgotten to turn the darn thing on!). You can cool it down to the ideal 116F if you leave the lid of the crockpot off. My husband’s uncle even puts his in the fridge to cool! I know that other people use glass jars, heating pads or a prewarmed oven, but I continue to use my crockpot because I find it a convenient vessel in which to heat, cool and incubate the milk.
Making your own yogurt, although time-consuming, is incredibly easy. And relatively inexpensive, especially if you eat a lot of yogurt or are going the organic route. I hope this helps anyone who is considering making their own yogurt, or who already does and wants more consistent results.
Taking this to Potluck Fridays!

Nutritional Disclaimer
Please note that I am not a medical or nutritional professional. I am simply recounting and sharing my own experiences on this blog. Nothing I express here should be taken as medical advice and you should consult with your doctor before starting any diet or exercise program. I provide nutritional information for my recipes simply as a courtesy to my readers. It is calculated using MacGourmet software and I remove erythritol from the final carb count and net carb count, as it does not affect my own blood glucose levels. I do my best to be as accurate as possible but you should independently calculate nutritional information on your own before relying on them. I expressly disclaim any and all liability of any kind with respect to any act or omission wholly or in part in reliance on anything contained in this website.
Free Bonus: Secrets to Keto Baking!
Sign up for your favorite recipes delivered straight to your inbox plus get our FREE bonus: Secrets to Keto Baking!


Yogurt can also be made in your instant pot! I do all the time. 🙂
Thank you so much for these tips. I used to do this but stopped a long time ago. I was re-inspired to start by reading this post, and your tips really made the whole process fool-proof. I'm about to go get some of my lovely homemade greek yogurt out of the fridge for a snack–at 1/4 the cost of storebought!
Very cool! Never made home made yogurt! Love to try though!
You've inspired me — I started a double-batch this morning. Then I'm going to drain that to yogurt cheese and make a cheesecake out of it. Now that's homemade! Thanks for the extra tips…Theresa
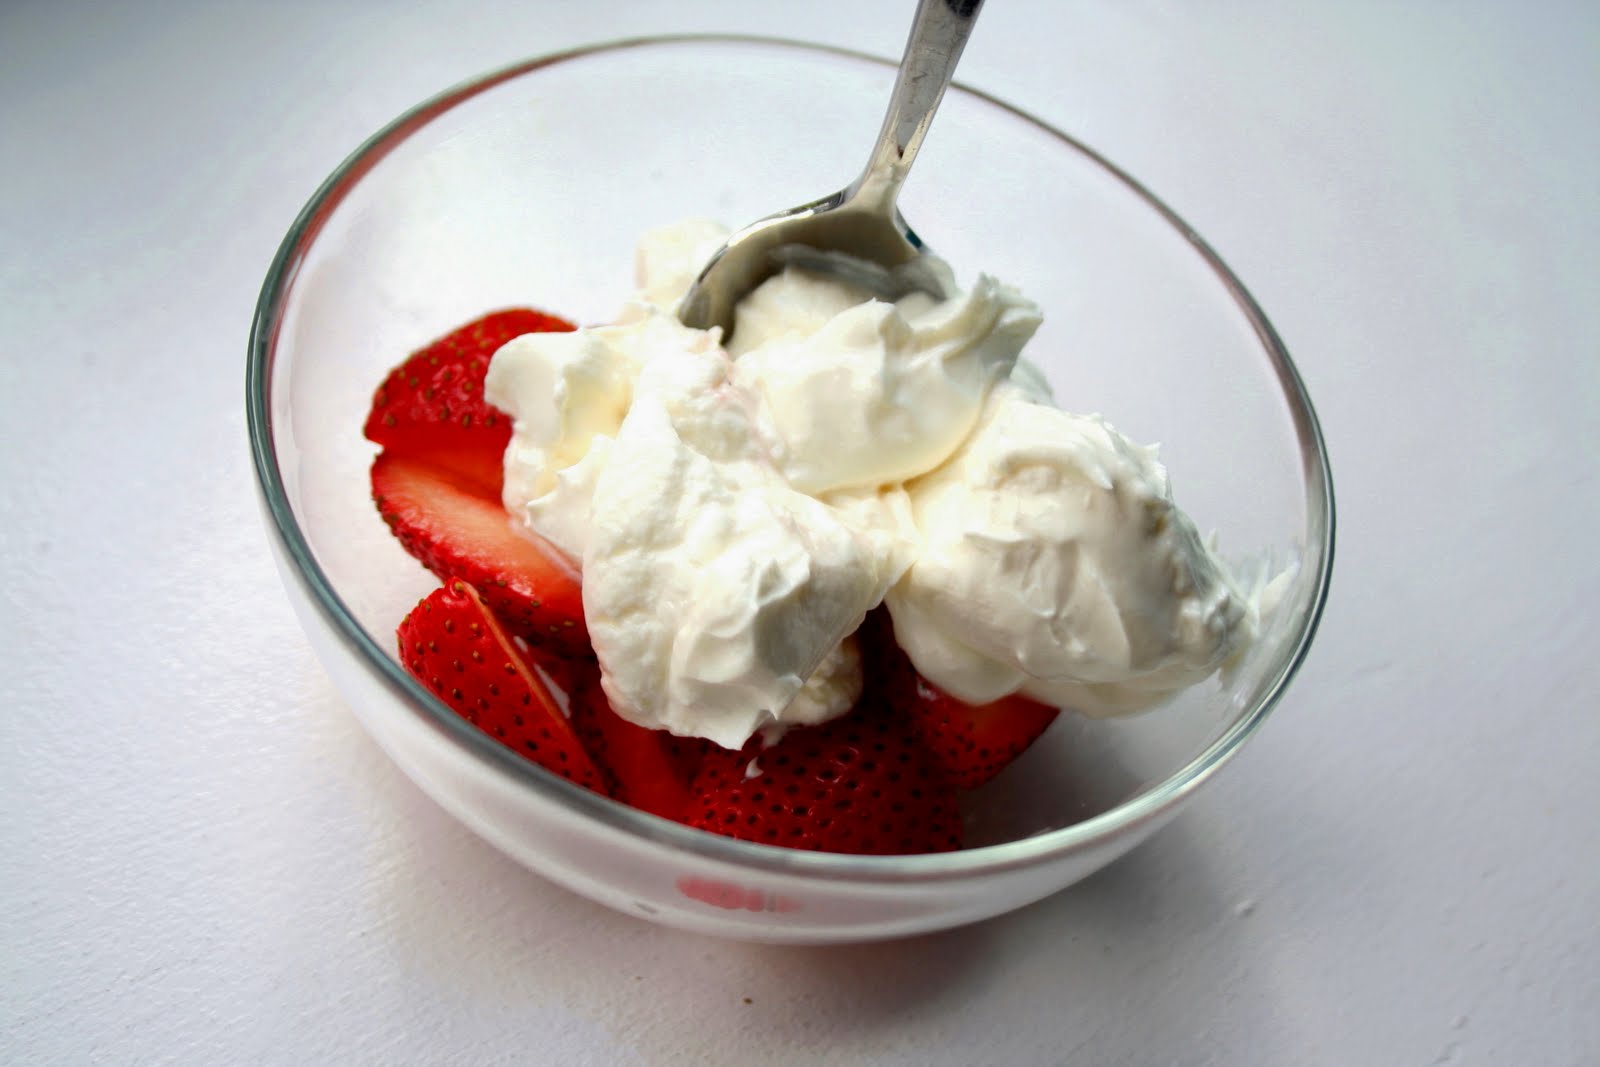
great, very impressive! love your shot, and the strawberries…i can see its yummy! happy weekend!
Thank you for sharing with us how to make homemade Greek yogurt, we all love it but never thought it make our own.
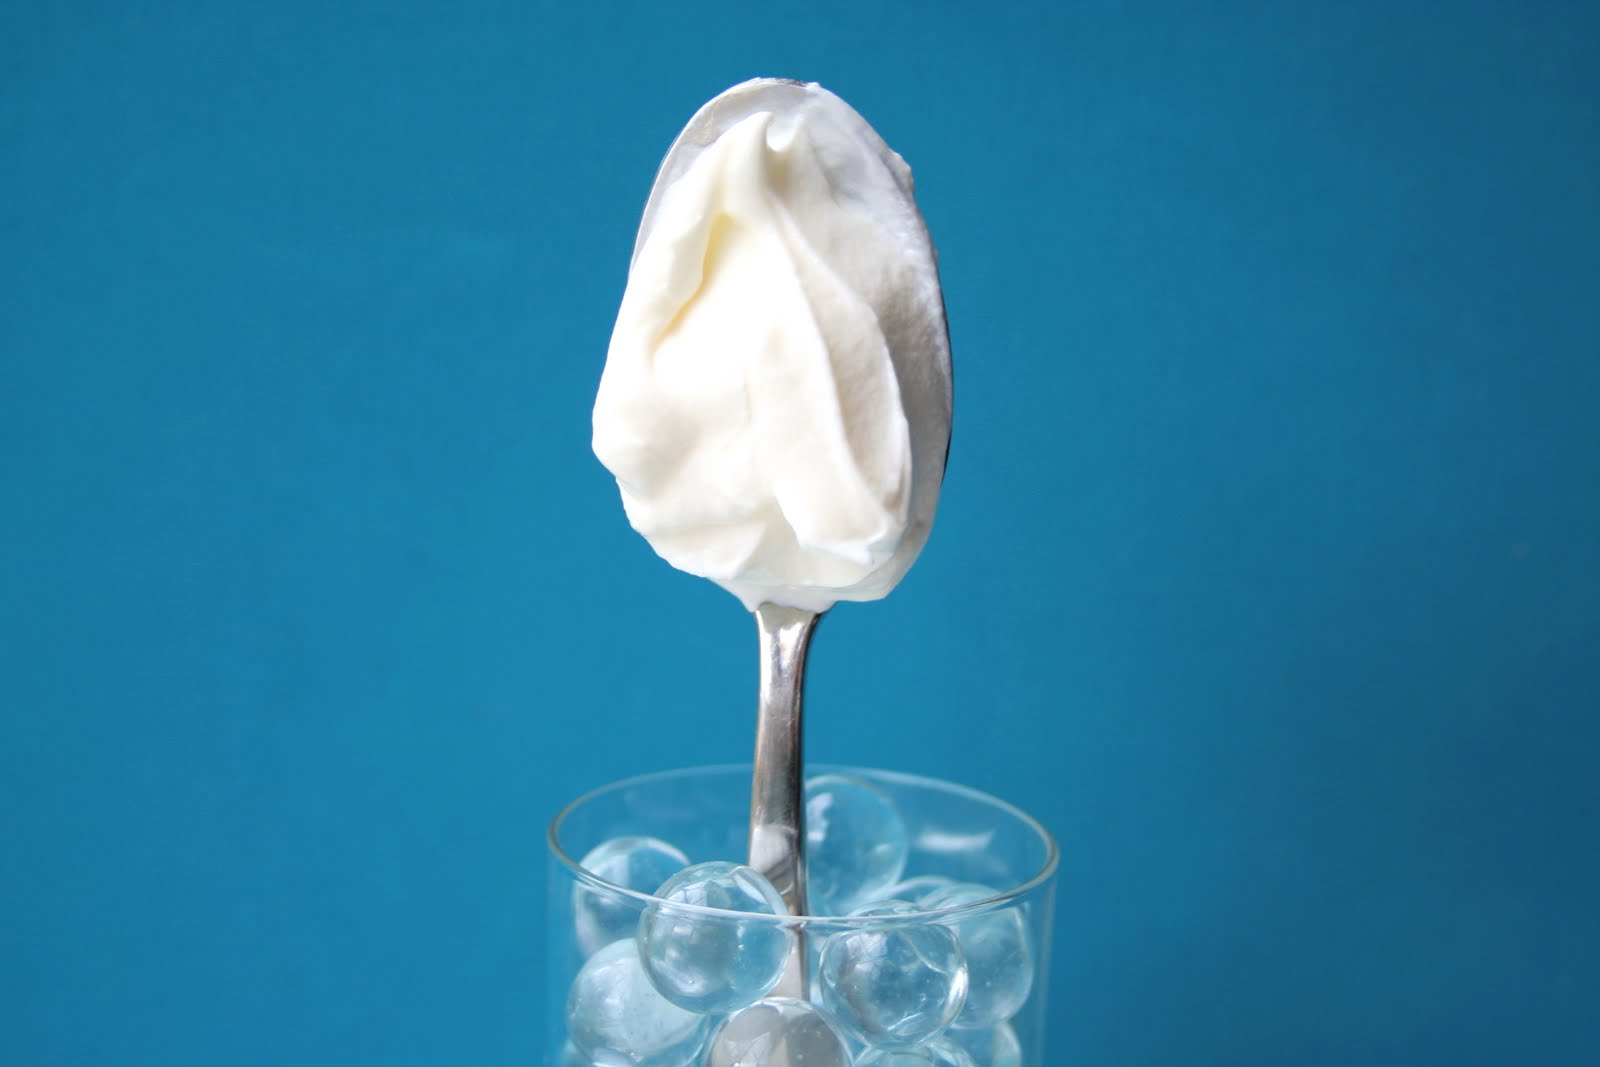
Love the picture of the yogurt on the spoon, make me wanna lick it .. oops
Carolyn, this sounds wonderful!! I didn't know this could be done! I'll have to go check out your previous post and give this a shot! Thank you so much for sharing with Friday Potluck!
I think I missed your previous post. I've never made homemade yogurt. I always thought it's too hard to get it really good but you are making me reconsider the effort!
My mother used to make yogurt at home…and I have fond memories of it. These days we just buy yoghurt. Bravo for making your own!
Thank you for showing how easy yoghurt can be to make. Armed with all of your good information, I have no more excuses not to make my own. BTW, your yoghurt pictures are gorgeous!
thank you for this post… i really love it.
Oh my goodness, we must be telepathic. I was just wondering how to make my own Greek yoghurt this morning and here you are with this very helpful post! I'm thinking the process is probably quicker in hot climates like ours. Still need a kitchen thermometer though, and rip up The Guy's t-shirt to achieve such perfection!
This post has actually left me speechless. I don't know if it's because the thought of making my own yogurt scares me or if your kitchen ingenuity did it. I'm sure it's the latter. Nonetheless… you are a kitchen rockstar in my eyes!
Your home made yoghurt looks amazing, tasty & thanks for the tips too!
I just answered all of your questions, taggs that you tagged me with & I asked 10 new questions to other bloggers,..Come over & check it out , my friend!
Ok, I have to admit that I barely make yoghurt at home. I love rich and creamy yoghurt… and this info just make me wanna make them at home more often 🙂
Carolyn,
Great info on making yogurt. Looks yummy!