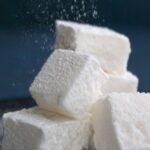

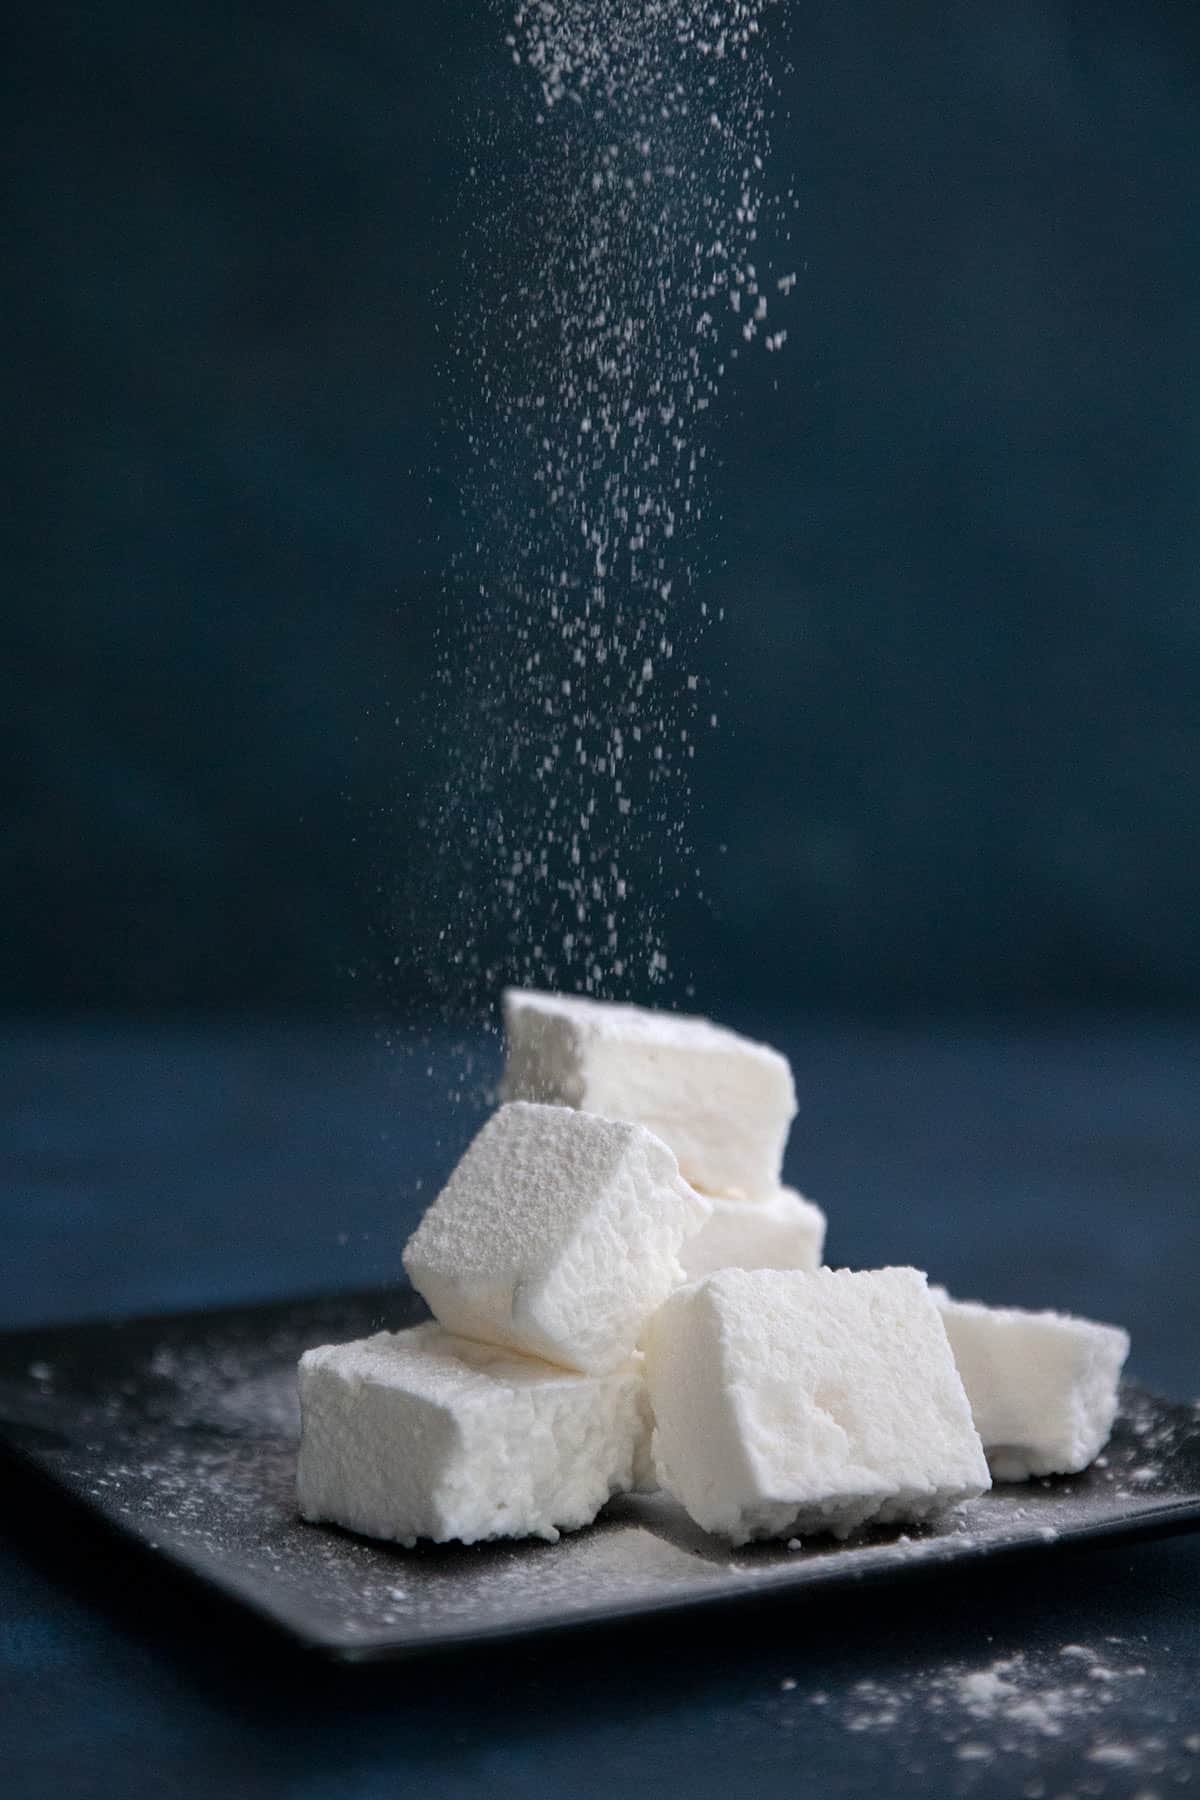
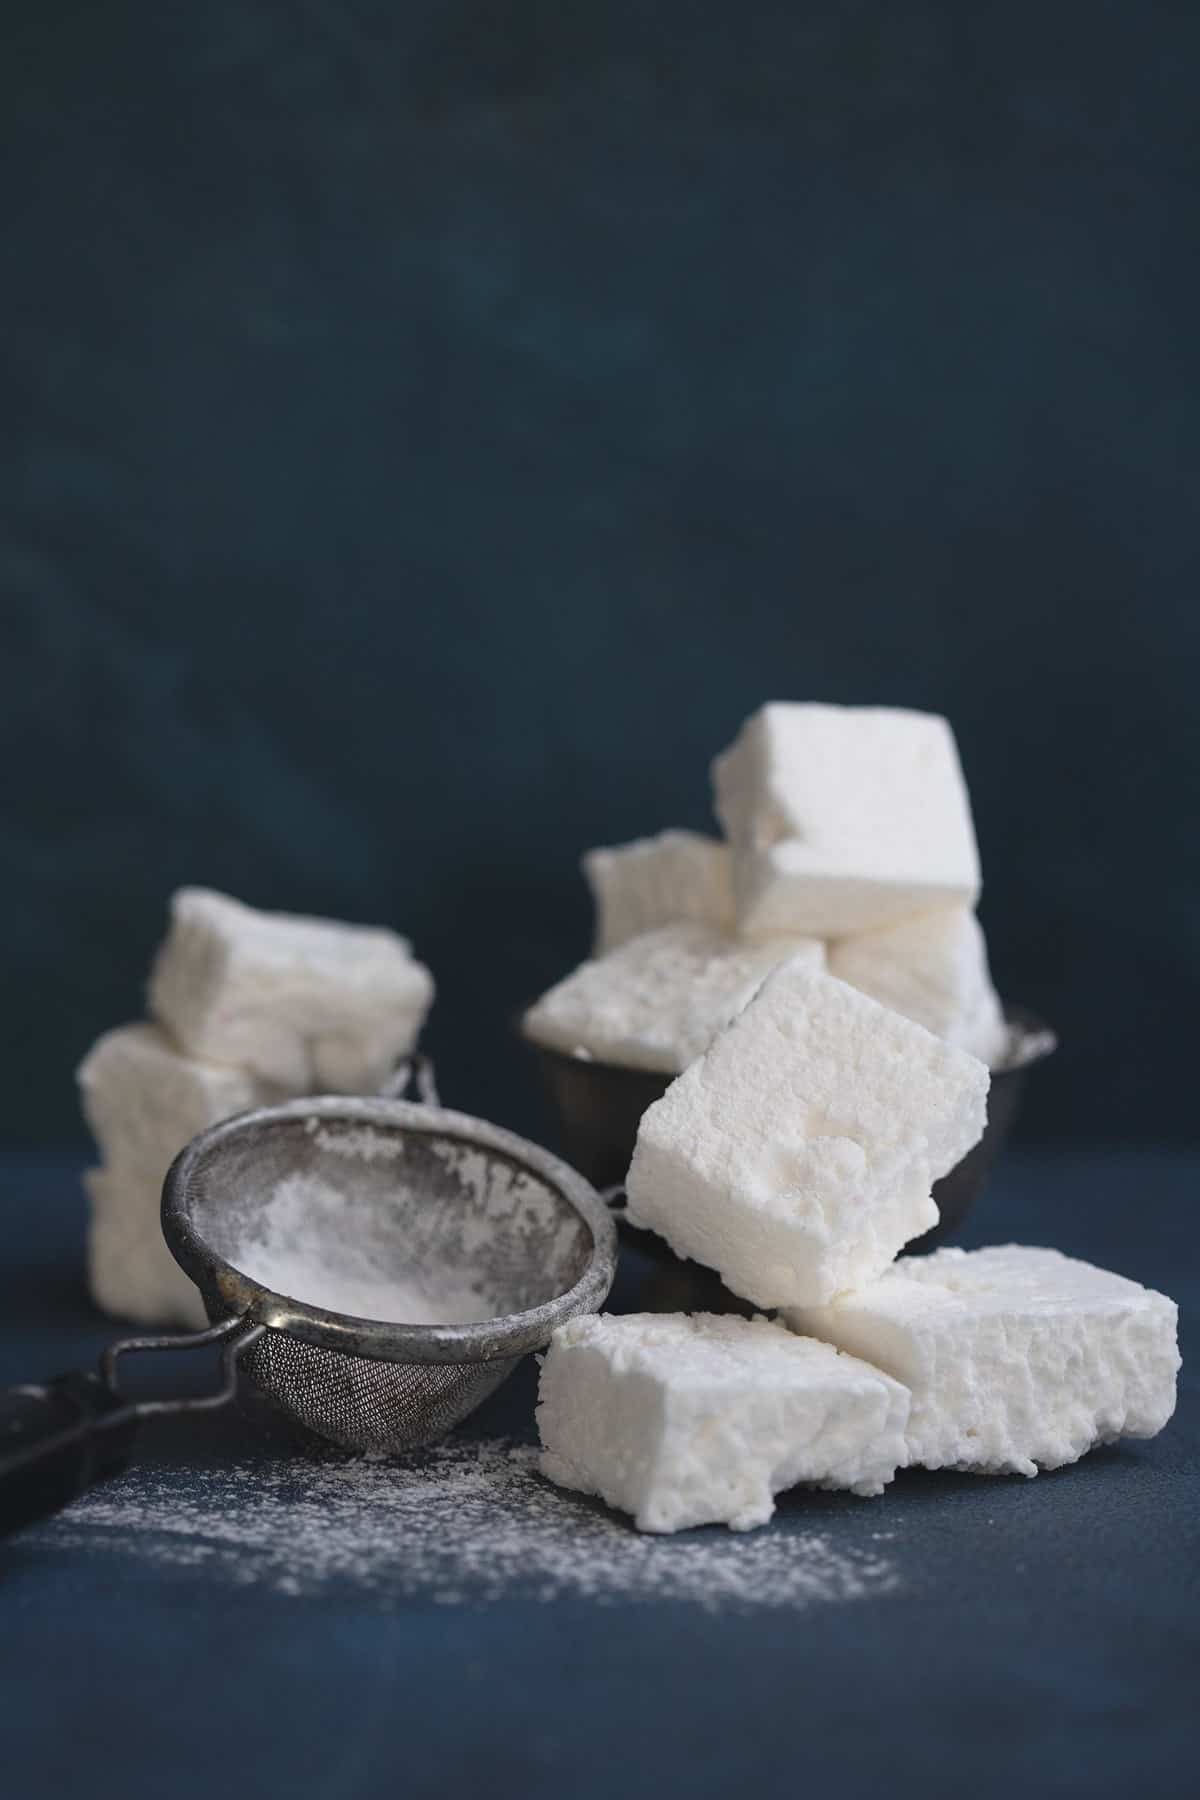
You will be astonished at how easy it is to make sugar free marshmallows at home. These keto friendly treats are perfect in hot chocolate and delicious on their own. And they are almost completely carb free!

Seriously, people, please tell me why it took me so long to try making my own keto marshmallows??? I am kicking myself. HARD!
I finally decided to give it a try a few years ago, after many reader requests. And I was utterly dumbfounded by how easy it was. My only regret was that I didn’t try it earlier.
The truth is that I don’t like marshmallows all that much. Let me rephrase that. I don’t like conventional marshmallows all that much and I never have. I find them way too sweet and lacking in any flavor.
And most of the packaged sugar free marshmallows on the market are kind of scary. Maltitol, and sorbitol, and sucralose, oh my! Don’t go there. Just don’t.
But now you don’t have to, because this sugar free marshmallow recipe will blow your mind. And you can use them in other wonderful desserts like Keto Rocky Road Fudge or Mississippi Mud Bars.
You need to try this!
Have I mentioned how easy these are to make? Really, quite shockingly easy. The hardest part is waiting for them to dry out properly.
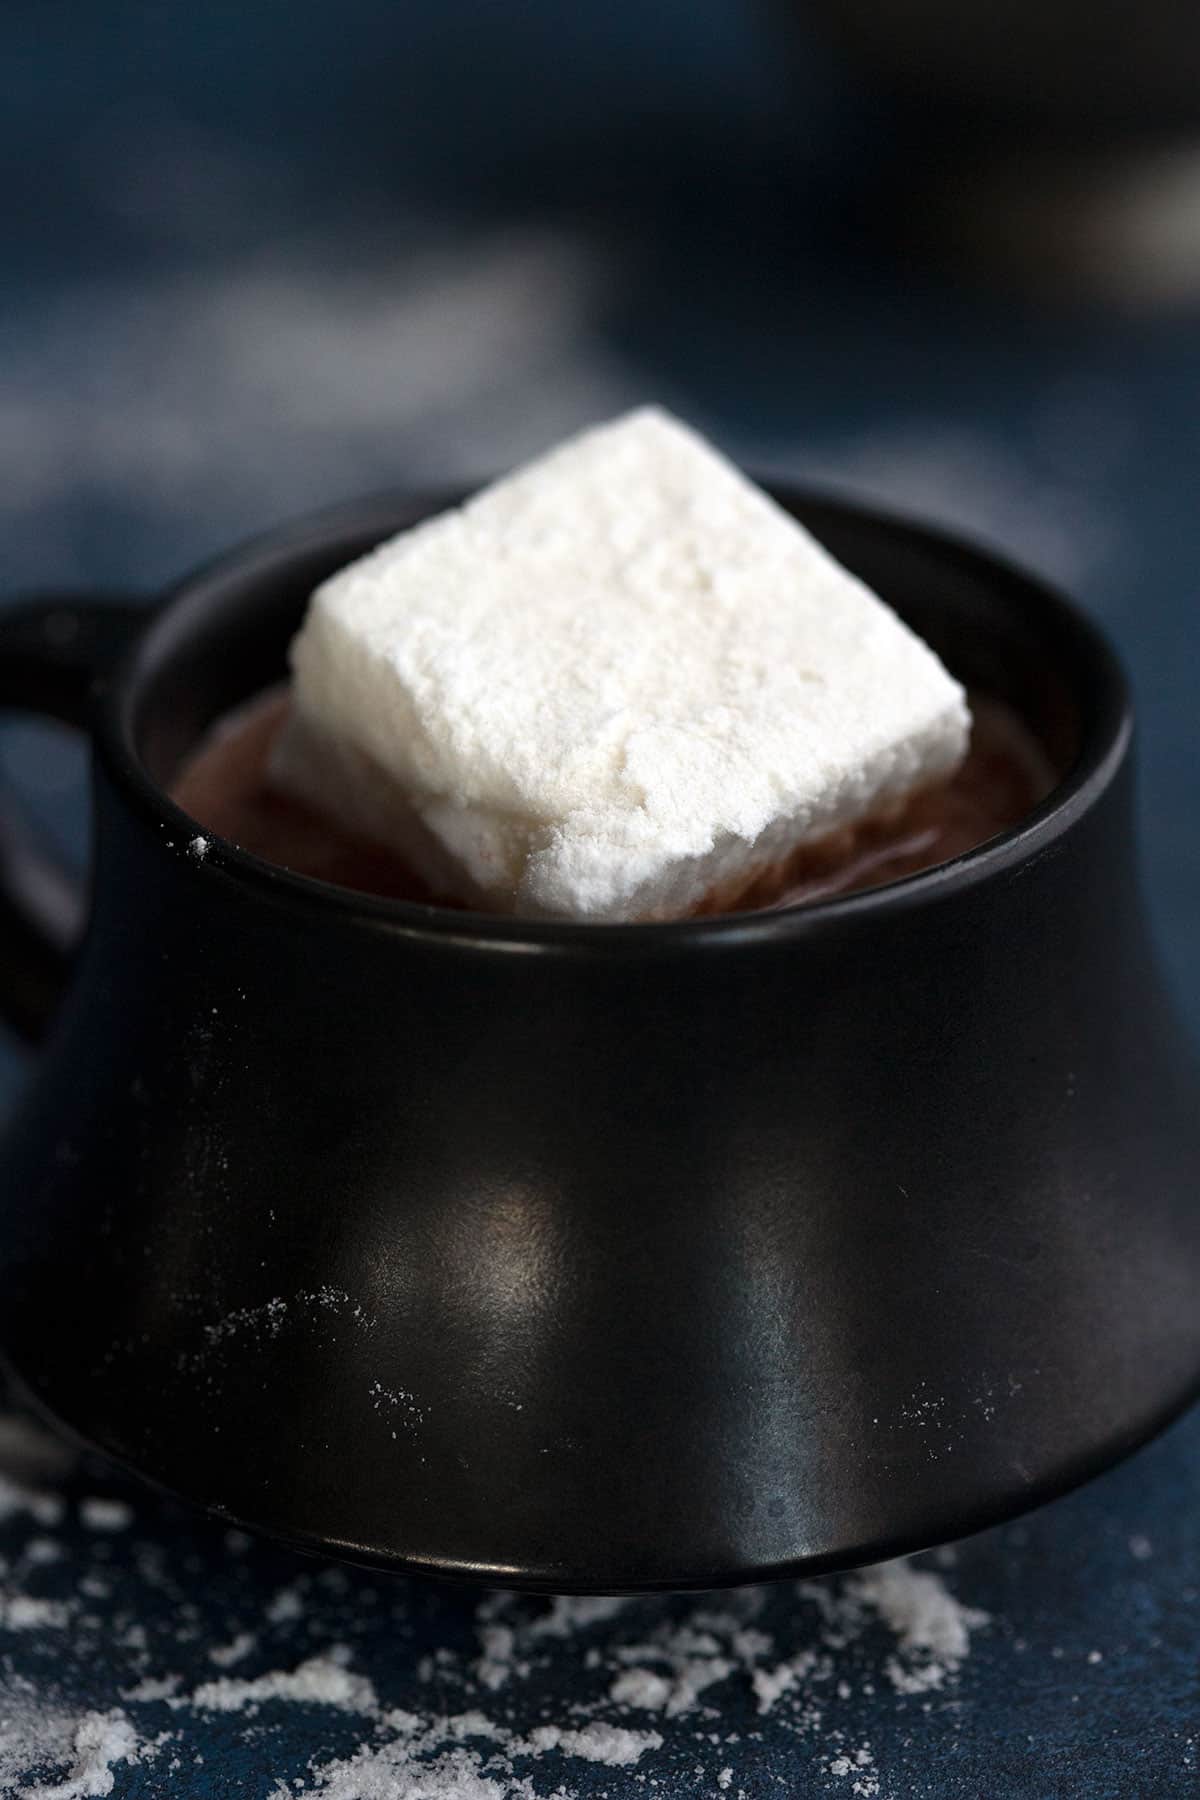
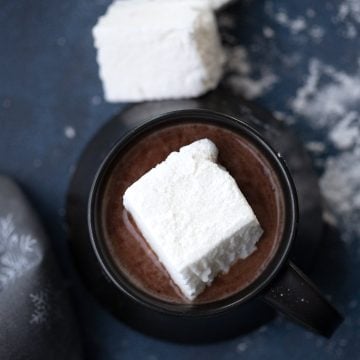
They’re also quite tasty and I like them far better than those made with sugar. They are pillowy and soft, with a balanced sweetness. And they melt slowly and delightfully in a mug of keto hot chocolate.
I did a quite a bit of research when I created this recipe. I honestly hadno idea what marshmallows were even made of, besides copious amounts of sugar. Most of them also have plenty of corn syrup.
I did manage to find a few corn syrup-free recipes, like this one, that I used as a guide. But I did a couple of things differently to make them keto friendly. I used more gelatin and quite a bit less sweetener than the recipe called for.
And it worked like a charm! Hooray! So much better than regular marshmallows, since they aren’t tooth-achingly sweet.
Reader Testimonials
Here’s what readers are saying about my sugar free marshmallow recipe:
“These are amazing and even my kids love them and can’t tell the difference!” — Kiley
“Omg I just made these marshmallows and tasted the spoon after pouring them into the pan, and they’re absolutely amazing! Just like the real thing. Thank you!” — Hannah
“WHAT….. These are AMAZING! They’re already amazing straight out of the mixer (I couldn’t help myself) and are even more incredible when they’ve had time to set! Tomorrow I’ll be making the No-Bake Smores Bars with them! THANK YOU for another home run!” — Elizabeth
“These are a new staple recipe in my house – I couldn’t tell the difference between the full sugar kind. They even brown well when put in fire!” — Christine
Ingredients you need
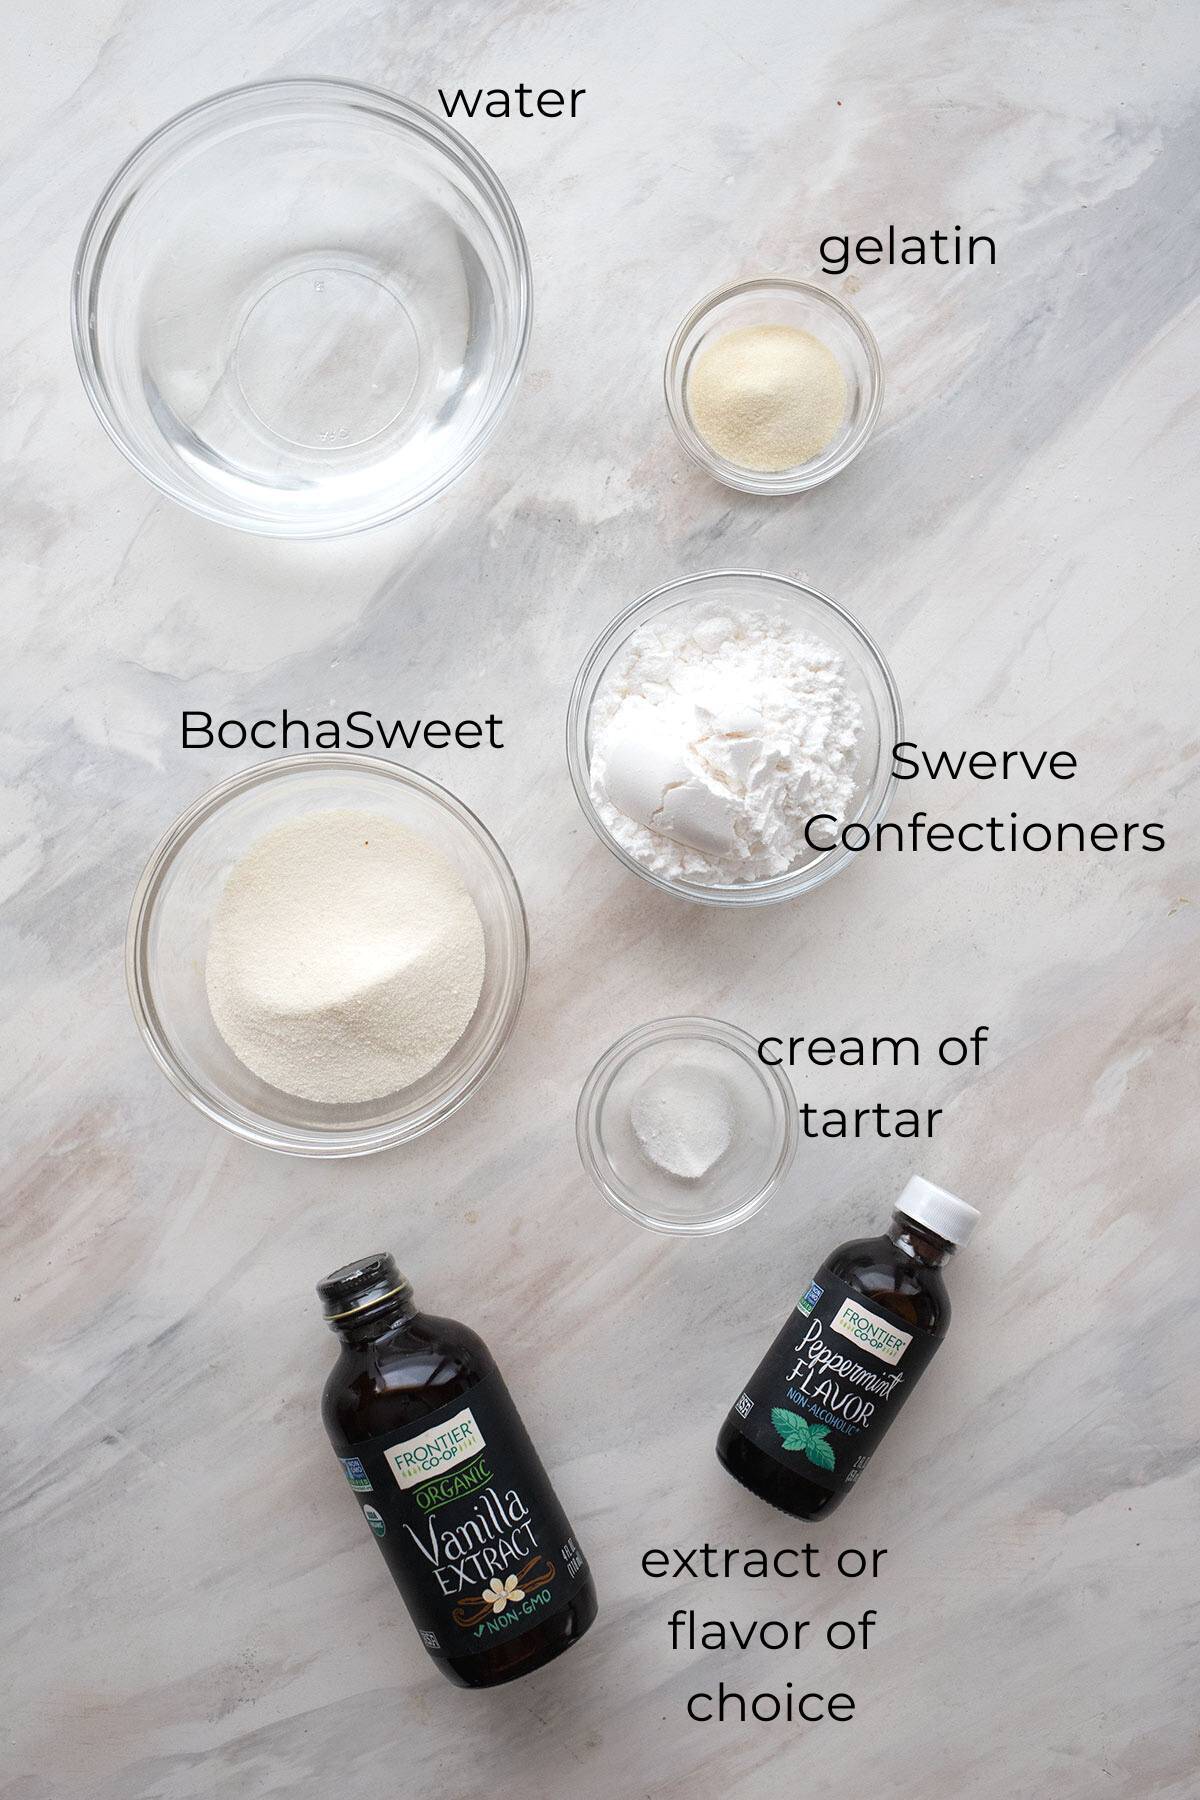
- Gelatin: I always use good grassfed gelatin in my keto recipes. But Knox gelatin will work as well. It has more gelling power so you need to use less. Try about 1 1/2 tablespoons.
- Sweetener: I use two different sweeteners for these marshmallows to give them the right consistency. Powdered Swerve and BochaSweet work well together so that they firm up properly but they don’t become too hard and recrystallize. Some readers have had success using all of one or the other. I do not recommend allulose here as it makes them so soft that they melt away the moment you use them in anything.
- Cream of tartar: This useful baking ingredient is made of tartaric acid. Cream of tartar helps stabilize egg whites and other whipped recipes such as these keto marshmallows. You can skip it but I do recommend it.
- Pinch salt
- Extract or flavoring: Use vanilla for regular marshmallows. But you can also have fun playing with the flavors here. Peppermint extract is delicious, but caramel extract is tasty too!
Step by Step Directions
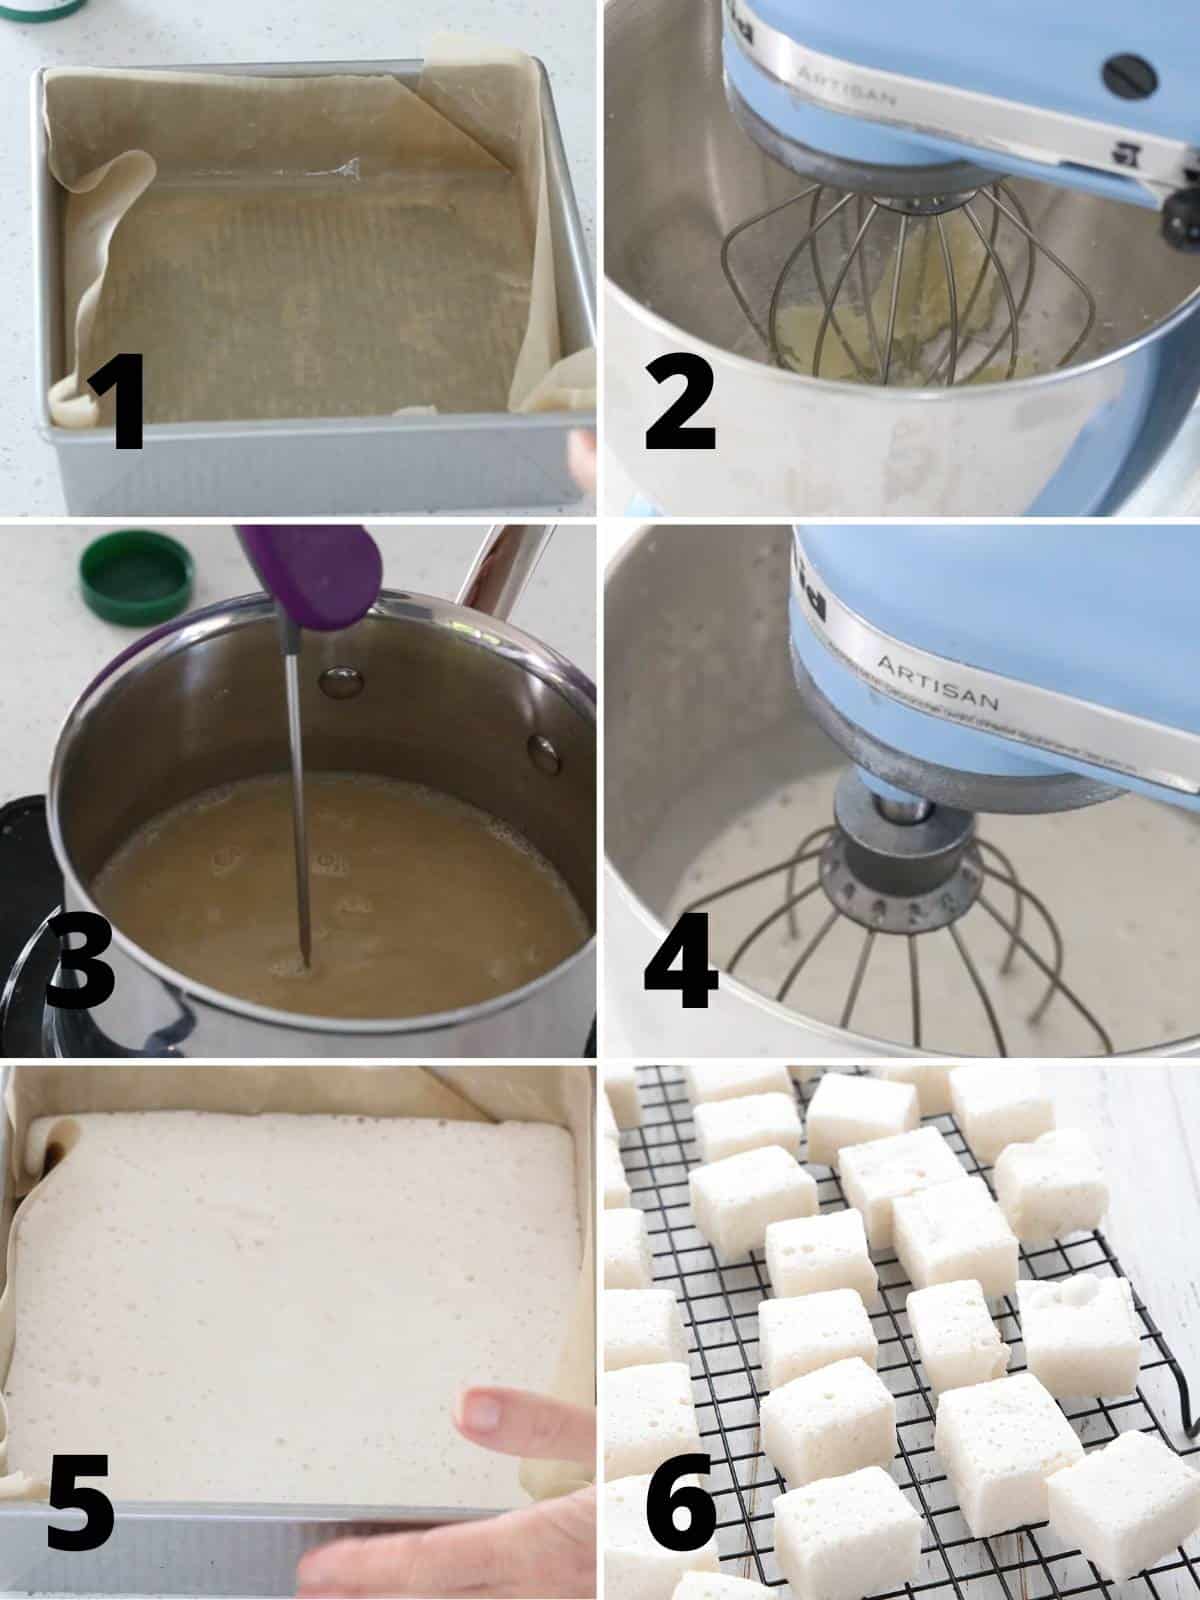
1. Prep the pan: Line an 8×8 inch pan with parchment or waxed paper and lightly grease the paper.
2. Bloom the gelatin: Attach the whisk attachment to a stand mixer. Pour half of the water into the bowl and sprinkle with the gelatin. Let stand while preparing the syrup.
3. Make the sweetener “syrup”: In a medium saucepan over medium heat, combine the remaining water, the sweeteners, the cream of tartar, and the salt. Bring to a boil, stirring to dissolve the sweeteners. Using a candy thermometer or an instant read thermometer, bring the mixture to 237F to 240F. Remove from heat.
4. Beat until fluffy: Turn the stand mixer on low and slowly pour the hot syrup down the side of the bowl. Once all of the syrup is mixed in, add the extract. Turn the stand mixer to medium high and beat until the mixture is lukewarm, thickened and white. This can take 5 to 15 minutes.
5. Spread in the pan: Working quickly, pour the mixture into the prepared pan and smooth the top. Let set for 4 to 6 hours, until the top is no longer tacky to the touch.
6. Let them dry: Flip out onto a cutting board and cut to the desired size. Dust with powdered sweetener, if desired. Let sit for a day exposed to the air to dry out a bit, then store in a covered container.

Expert tips
I’ve made these keto marshmallows many, many times and I’ve learned a few things along the way. So I figured I’d pass these tips on to you!
Make sure to let the gelatin bloom in water for a few minutes, as it allows the gelatin to combine properly with the hot syrup. Also remember that gelatin and collagen are not the same thing. Collagen does not work in this recipe because it does not have the gelling powder of gelatin.
Erythritol based sweeteners such as Swerve will recrystallize if used on their own. And sweeteners like Bocha Sweet will leave you with a goopy mess that may not firm up properly. So using them in combination is best. I do not recommend allulose for these sugar free marshmallows, as it makes them extra soft and they melt away too easily.
Work quickly once your mixture is thick and white. Very quickly pour it into the prepared pan and spread it. If you wait too long, it starts setting and you will get a one big lump that you can’t spread properly. But you can rewarm the mixture gently until spreadable, if this happens.
Use whatever flavoring or extract you desire. Vanilla is the standard, but peppermint extract or caramel extract are delicious too!
Frequently Asked Questions
Many sugar free marshmallows contain artificial sweeteners such as aspartame and sucralose. Other use maltitol, which can spike blood sugar. However, this recipe is made with natural keto sweeteners, gelatin, water, and a little vanilla extract.
These keto marshmallows have only 0.1g carbs per serving!
Keto marshmallows can keep for weeks and weeks, as there is nothing in them that spoils. You can store them on the counter in a covered container for 2 to 3 weeks. You can also refrigerate or freeze them them for several months. I had a batch in the refrigerator for over 2 months and it was just as good as when I first made them.
Sugar Free Marshmallows
Ingredients
- 1 cup water, , divided
- 2 1/2 tbsp grassfed gelatin
- 2/3 cup powdered Swerve Sweetener
- 2/3 cup Bocha Sweet
- 1/8 tsp cream of tartar
- Pinch salt
- 1 tsp vanilla extract
Instructions
- Line an 8×8 inch pan with parchment or waxed paper and lightly grease the paper.
- Attach the whisk attachment to a stand mixer. Pour half of the water into the bowl and sprinkle with the gelatin. Let stand while preparing the syrup.
- In a medium saucepan over medium heat, combine the remaining water, the sweeteners, the cream of tartar, and the salt. Bring to a boil, stirring to dissolve the sweeteners.
- Using a candy thermometer or an instant read thermometer, bring the mixture to 237F to 240F. Remove from heat.
- Turn the stand mixer on low and slowly pour the hot syrup down the side of the bowl. Once all of the syrup is mixed in, add the extract. Turn the stand mixer to medium high and beat until the mixture is lukewarm, thickened and white. This can take 5 to 15 minutes.
- Working quickly, pour the mixture into the prepared pan and smooth the top. Let set for 4 to 6 hours, until the top is no longer tacky to the touch.
- Flip out onto a cutting board and cut to the desired size. Dust with powdered sweetener, if desired. Let sit for a day exposed to the air to dry out a bit, then store in a covered container.
Video
Notes
Nutrition
Nutritional Disclaimer
Please note that I am not a medical or nutritional professional. I am simply recounting and sharing my own experiences on this blog. Nothing I express here should be taken as medical advice and you should consult with your doctor before starting any diet or exercise program. I provide nutritional information for my recipes simply as a courtesy to my readers. It is calculated using MacGourmet software and I remove erythritol from the final carb count and net carb count, as it does not affect my own blood glucose levels. I do my best to be as accurate as possible but you should independently calculate nutritional information on your own before relying on them. I expressly disclaim any and all liability of any kind with respect to any act or omission wholly or in part in reliance on anything contained in this website.
Free Bonus: Secrets to Keto Baking!
Sign up for your favorite recipes delivered straight to your inbox plus get our FREE bonus: Secrets to Keto Baking!


The chocolate ice cream was extremely rich & almost tasted like hot cocoa flavor. I used ChocZero mini marshmallows and cut them up into tiny pieces which might have been a mistake, when I saw, they needed to be chopped, because when I added them and the nuts to the mixture, the marshmallows became hard and crunchy. Next time I will add bigger marshmallow pieces and add to the mixture after removing from the ice cream maker. Overall it was very tasty!
these are awesome!!! i haven’t tried a recipe of yours yet that i didn’t love!!
Hello, I made your marshmallow recipe for the first time. It should’ve read the comments beforehand because I did use alulose😵💫. They do still taste wonderful but the only problem I see is my marshmallow from top to bottom is not completely white like the clouds in the sky, but a very small layer at the bottom is a slight yellow color. So I’m wondering if that is the gelatin at the bottom of my pan.
Honestly, I wish I could say! I’d have to see what you did to know more. But yes, allulose tends to make them so overly soft…
Hello, as of March 20, 2026 the link you have for Bocha Sweet is not active any longer. The only Bocha Sweet that Amazon has listed right now is a confectioners version. Is there any substitute for the Bocha Sweet in your marshmallows or must i go through the Bocha Sweet site and pay the $34 for a 1# bag?
I don’t use BochaSweet anymore… try using xylitol.
I can not find bocha sweet anymore? What else can we use? Really love this recipe, the marshmallows turn out great, I am worried about this batch. thank you for all the great recipes.
Xylitol works!
Thank you, love all your recipes, I have alot of zylito, so thank you again!!!!
Everyone loves the keto smores bites so much that they have become a Christmas cookie favorite.
If I don’t allow the marshmallows to stiffen, can the soft mixture be used in place of Marshmallow Kreme when making a keto version of Fantasy Fudge?
Hello Carolyn,
I have been wanting to makes these for a very long time but never got around to it. Do you think a monkfruit/allulose blend would work? I have both dogs and cats and will not bring Xylitol in our house because I am a messy baker lol. If so can it be used for the both sweeteners you mention?
Thanks for your hard work and delicious recipes❤️
Sherry
Unfortunately, allulose makes them so soft, they don’t hold up. You could use just erythritol.
Ok, thank you so much!