As a low carber who has a completely new take on nutrition, I feel free to eat butter with abandon. But I do worry some about all of the chemicals and hormones in standard storebought butter, as many toxins taken in by animals store primarily in the fatty tissues. So I make an effort to use organic, and when I can get my hands on it, grass-fed butter. Now that stuff tastes like heaven!
But the idea of making my own butter started when I received a cookbook I’d won on another blog, The Whole Family Cookbook. It’s a cookbook devoted to whole foods for kids, and it employs a lot of fun ideas for kids to help out in the kitchen. The cookbook ended up buried under a mountain of other books and magazines on my bedside table, but the idea of making butter stayed with me. And when I finally made it out to a creamery that sells un-homogenized whole cream (pasteurized still, but none of the fillers that keep it from separating), I bought a half-gallon with the specific idea of making my own butter.
There are a number of ways you can beat your cream into butter that don’t involve having an old-fashioned butter churn (remember those things? The sort of wooden barrel with a handle that you inevitably see in places like Colonial Williamsburg or Black Creek Pioneer Village!). I know you could probably do it in a stand mixer or a food processor. But I decided to have fun with it and do it the way the kids’ cookbook suggested, which was simply to pour some cream in a jar, put on the lid, and shake the heck out of it for 20 minutes or so. Turned out to be great exercise for my arms, too! I tried to get the kids involved, but they are a little young for being able to sustain that kind of constant shaking motion for very long.
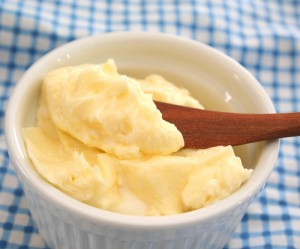
I’ve now made my own butter several times and it’s absolutely heavenly. Freshly churned butter has no equal. I’ve learned a few things along the way, so here are a few quick tips to help you out:
- Don’t fill the jar more than half full. The cream needs room to whip and expand and take on air and it can’t do that if you fill the jar to the brim.
- You will be able to tell when you’ve got whipped cream, because suddenly the cream is no longer sloshing around in the jar. Keep shaking after that if you want butter.
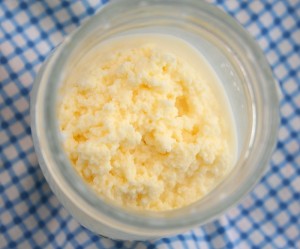
- You will be able to tell when the butter is starting to form, because the buttermilk comes out of the cream and starts sloshing around again. Keep shaking for a bit longer to really bring the butter together and get out all the buttermilk. Once you have one smooth lump of butter in the bottom, you’re done.
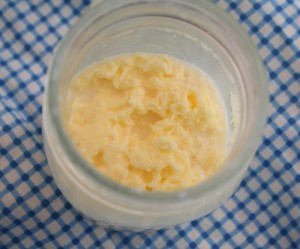
- If you like salted butter (I do), a little pinch of salt will be enough. And don’t bother drinking the buttermilk if you salt the butter…it gets REALLY salty and tastes awful.
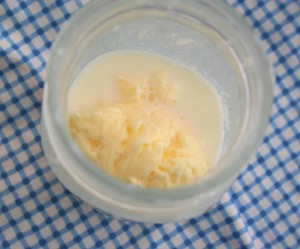
- Consider adding some fresh chopped herbs to the freshly churned butter…the butter is really soft when it’s first formed, and you can stir in anything you want very easily (I did one version with cilantro). It will harden when you put it in the fridge.
- The more cream you put in the jar, the longer it will take to become butter.
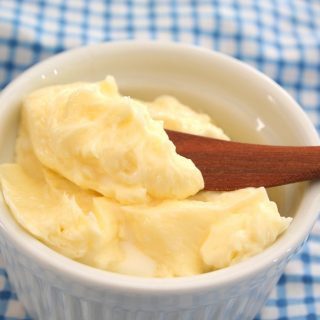
Homemade Butter
Ingredients
- 1/2 to 1 cup whole cream, preferably non-homogenized, but if that's not available, just be sure it has no fillers like carageenan
- Pinch salt, if desired
- 1 tbsp fresh chopped herbs to add at the end, if desired.
Instructions
- Pour cream into a clean jar with a tight lid (for 1/2 cup, use a half-pint jar, but for any more cream, use a larger jar)
- Add salt, if using.
- Seal the jar and shake the heck out of it until it stops sloshing (has become whipped cream).
- Keep shaking until it starts sloshing again (buttermilk has come out of the cream).
- Keep shaking a bit more until the butter is one smooth lump at the bottom.
- Pour off buttermilk.
- Add any herbs and stir.
Free Bonus: Secrets to Keto Baking!
Sign up for your favorite recipes delivered straight to your inbox plus get our FREE bonus: Secrets to Keto Baking!



Lisa, this may sound like a stupid question but what is whole cream and where can you get it? I assume this isn’t heavy whipping cream is it? Do you have to go to a dairy to get it?
Yup, heavy cream, whipping cream, whole cream…35% milk fat. All pretty much the same thing.
As a teacher who makes butter in jars with her young students….I have found that putting a clean marble or two in the cream jar adds extra friction so the butter forms quickly. Also, when the marble no longer makes noise you know when you can stop shaking the jar! With really little kids we all sit on the floor and roll the jars to each other. Again, the marbles help with the friction, so it doesn’t take very long at all! Great recipe! Yippee for butter! 🙂
Cool! I am so trying this!
Wow…I haven’t done this since my kids were young and we did a school project…that needs to change!
To speed up the process using a jar, throw in couple marbles. We had a jar and marbles we used exclusively for butter making. Now that kids are older, I just do it in the Kitchenaid. Also I pour the buttermilk off before I add salt. That way I can use the buttermilk too.
Marble! Brilliant!
I love this. Honestly, never even thought of making my own but why not … Happy Friday 🙂
I’m all about enjoying real good for you butter and homemade is the best kind!
I love that you shake it. I never would think it would work.