

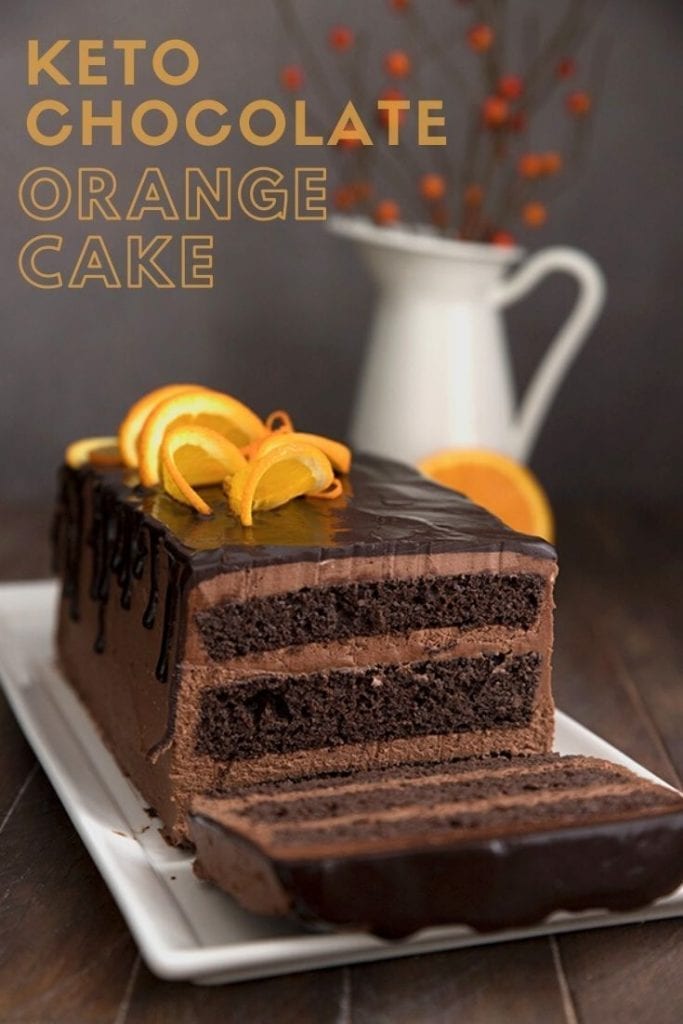
A stunning three layer keto chocolate cake with a touch of orange extract and a gorgeous chocolate drip glaze. This is a low carb dessert worthy of your time! This post is sponsored by Bob’s Red Mill.
Prefer a classic version? Be sure to check out my keto chocolate cake recipe.
Talk to me, keto bakeaholics! Talk to me about the joy you get in the kitchen when you set about to make a glorious keto dessert that it going to wow your friends and family.
Talk to me about how good it feels when that dessert comes together perfectly, and looks just like you imagined in your head. And when it tastes as divine as you had hoped.
There is no better feeling in the world, I think. I’d even venture to say that it’s rather addictive. It’s that feeling that keeps us returning to the kitchen again and again. Baking is my drug of choice.
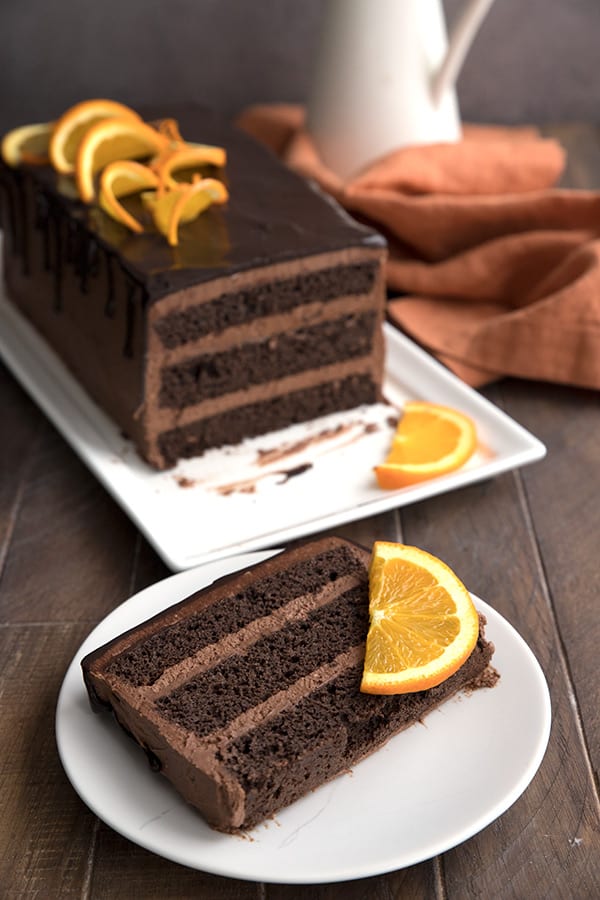
Well, this luscious Keto Chocolate Orange Cake was one of THOSE desserts. I sketched it out in my brain weeks before I started. I had a vision, if you will. And I think the photos show just how much it lived up to my vision.
Chocolate Orange Cake Inspiration
As you are probably well aware, I get much of my baking inspiration from Pinterest, and it was this gorgeous cake from Wilton that caught my eye.
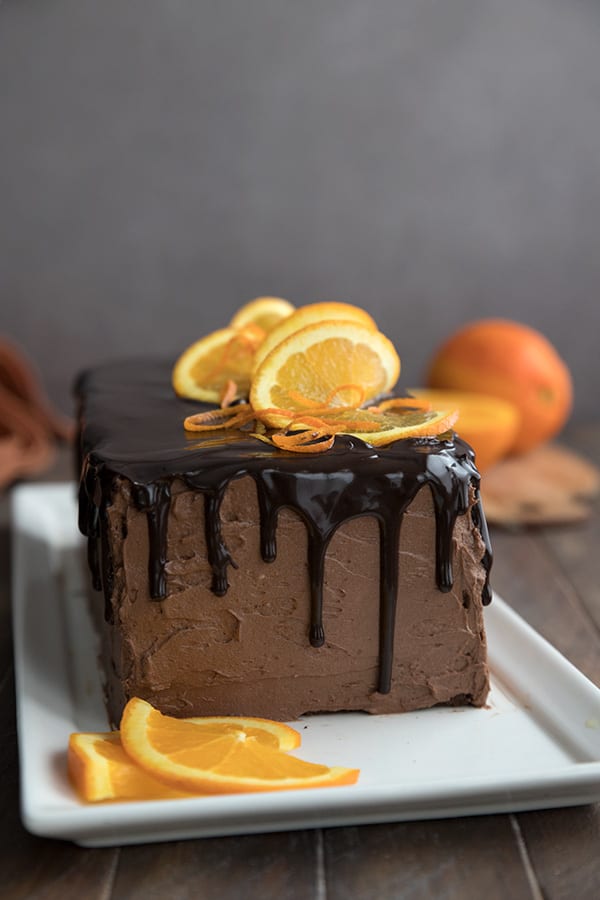
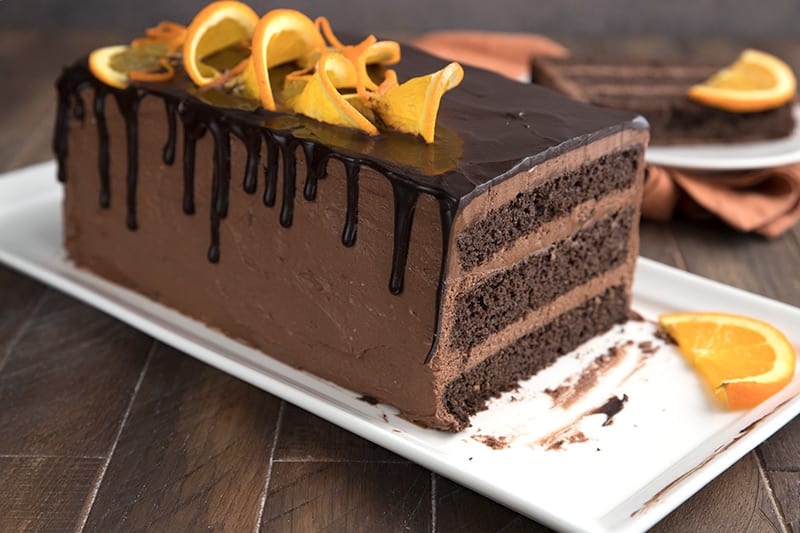
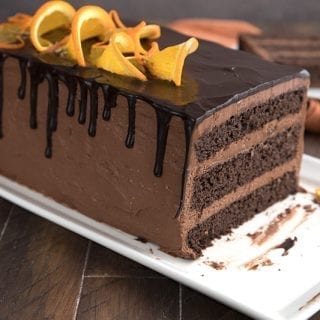
Those stunning layers of chocolate cake, that rich chocolate frosting, and the chocolate glaze, all tinged with a hint of orange – how could I resist? I loved the rectangular shape, as well. A nice change from the typical round layer cake.
Terry’s chocolate oranges were an oft-shared Christmas treat when I was growing up. And this keto chocolate cake embodies that flavor without the resulting sugar high.
Nut-Free Keto Chocolate Cake Recipe
For the chocolate cake layers, I decided to use my classic keto chocolate cupcakes recipe. That recipe happens to be coconut flour-based, making this elegant keto cake completely nut-free. Hooray for those of you with nut sensitivities!
Of course, I couldn’t do it without my friends from Bob’s Red Mill and their awesome organic coconut flour. It’s so consistent, I know I can trust it for great results. I use it in all of my coconut flour recipes and it hasn’t failed me yet.
And trust me when I say it makes the best keto bagels! And my keto pancake bites are always a hit with the kids.
Learn all the tips and tricks for baking with coconut flour.
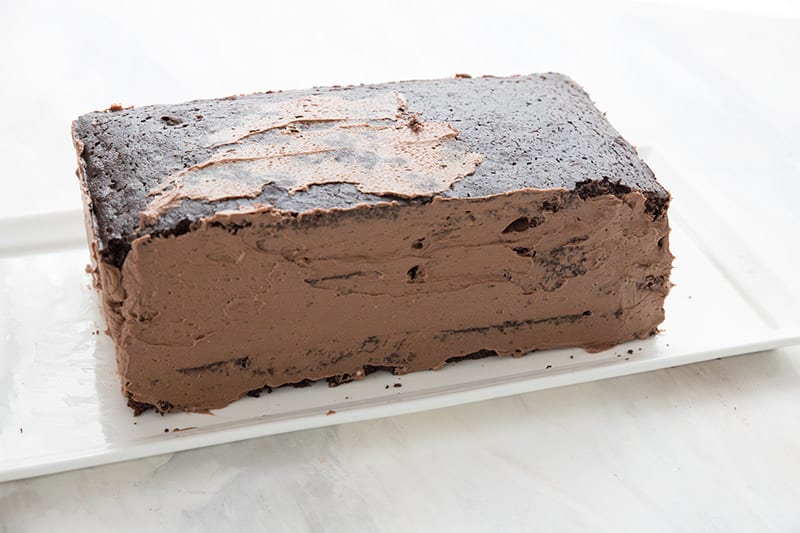
What is a crumb coat?
Now let’s get into a little technical baking talk, shall we? Learning about a crumb coat is going to help many of you when making keto cake recipes.
To create a rectangular cake, I baked it in a 9×13 pan and cut it into 3 even layers, each about 4 1/3 inches wide.
But cutting a cake this way means that the sides are extra crumby, and those crumbs can get into your frosting. If you’re a cake perfectionist, having little specks in your frosting is likely to drive you nuts.
Enter the crumb coat. A crumb coat is simply a thin layer of frosting spread over the sides of the cake first – so thin, you can usually see much of the cake through it. This helps smooth down the crumby bits so that they don’t stick to your offset spatula when you spread on the remaining frosting.
I recommend switching spatulas or cleaning your spatula before applying the second layer of frosting, to reduce the crumbs even more.
Tips for Keto Chocolate Orange Cake
This is an elegant keto layer cake that takes some effort to put together. But trust me, the effort is worth it! Here are my best tips for getting it right:
- Be sure to line the bottom of your bake pan with parchment paper. This will make it much easier to get out of the pan so you can cut three even layers.
- I recommend a combination of both orange and vanilla extract. Sometimes orange flavourings can be a touch bitter and a bit of vanilla helps mellow them out.
- Feel free to do another flavor altogether! Mint would be lovely in this cake too.
- Be sure to do the crumb coat on the sides, as outlined above. It will really make a difference to the smoothness of your frosting.
- When a recipe such as this one specifies room temperature ingredients, make sure you follow it. It’s important for a smooth batter and a smooth frosting.
- The drip glaze specifies two different sweeteners. This is because using only erythritol (like Swerve) can cause the glaze to recrystallize a bit when refrigerated. A bit of BochaSweet (or allulose) can keep it looking shiny and smooth. But if you can’t find it or don’t want to use it, all Swerve will still be great.
- Thin slices of orange as garnish make for a stunning cake. I didn’t eat them so they aren’t included in the nutritional information.
- For long strands of orange zest to decorate, use a cocktail zester.
- The cake is best stored in the fridge but I think it tastes best at room temperature. So cut a slice using a sharp knife (heat it up for cleaner slices) and let it sit out a few minutes before serving.
More keto orange flavored recipes
- Keto Cranberry Orange Scones
- Keto Cardamom Orange Biscotti
- Keto Chocolate Orange Spritz Cookies
- Keto Cranberry Orange Coffee Cake
- Keto Orange Olive Oil Cake
- Keto Orange Cheesecake Mousse
Keto Chocolate Orange Cake
Ingredients
Cake
- 2/3 cup (75 g) coconut flour, (73g)
- 2/3 cup (121.33 g) Swerve Sweetener
- 6 tbsp (36 g) dark cocoa powder
- 1/4 cup (27 g) unflavored whey protein powder
- 2 tsp baking powder
- 1/2 tsp salt
- 1/2 cup (113.5 g) butter, melted and cooled
- 6 large eggs, room temperature
- 1 tsp orange extract
- 1/2 tsp vanilla extract
- 1/2 cup (118.29 g) water, more if needed
Frosting
- 2 1/2 ounces (70.87 g) unsweetened chocolate, chopped
- 8 ounces (226.8 g) cream cheese, softened
- 1/2 cup (113.5 g) butter, softened
- 3/4 cup (136.5 g) powdered Swerve Sweetener
- 1 to 1 1/2 tsp orange extract
- 1/2 tsp vanilla extract
- 1/4 cup (59.5 g) heavy whipping cream, room temperature
Drip Glaze
- 6 tbsp heavy whipping cream
- 1 1/2 ounces (42.52 g) unsweetened chocolate, chopped
- 2 tbsp powdered Swerve Sweetener
- 1 tbsp powdered BochaSweet , (or an additional tbsp Swerve)
Garnish
- Thinly sliced orange
- Long strands of orange zest
Instructions
Cake
- Preheat the oven to 350F and grease a 9×13 inch metal rectangular pan. Line the bottom of the pan with parchment paper (cut to fit) and grease the paper.
- In a large bowl, whisk together the coconut flour, sweetener, cocoa powder, protein powder, baking powder, and salt.
- Stir in the butter, eggs, orange extract, and vanilla extract. Stir in the water until the batter is smooth. If the batter is overly thick, add more water, a tablespoon at a time, until it thins out. It should be thick but still pourable out of the bowl.
- Spread the batter evenly in the prepared pan and bake 20 to 25 minutes, until the cake has risen and the top is firm to the touch. Remove and let cool in the pan.
- Once the cake has cooled, run a sharp knife around the sides to loosen and flip it out onto a cutting board. Cut the cake crosswise into three even pieces.
Frosting
- Place the chopped chocolate in a microwave safe bowl and melt on high in 30 second increments, stirring in between, until melted.
- In a large bowl, beat the cream cheese and butter together until smooth. Beat in the sweetener and extracts, then add the melted chocolate and beat until well combined.
- Beat in the cream. Add more cream as necessary to achieve a spreadable consistency.
To Assemble
- Place one section of the cake on a cake platter. Spread the top with about 1/4 of the frosting. Repeat with the remaining two layers of cake.
- Use some of the frosting to crumb coat the sides of the cake (see the crumb coat section in blog post). Then spread the remaining frosting evenly over the sides of the cake.
Chocolate Drip Glaze
- In a small saucepan over medium heat, bring the cream to a simmer. Remove from heat and add the chopped chocolate. Let sit a few minutes to melt.
- Add the sweeteners and whisk to combine. Let cool a few minutes to thicken, and then slowly pour over the top of the cake along the edges, letting it drip down the sides.
- Smooth the glaze over the top of the cake.
Garnish
- Let the glaze set for about 20 minutes, then use thinly sliced oranges and strands of orange zest to decorate as desired.
Video
Nutrition
Nutritional Disclaimer
Please note that I am not a medical or nutritional professional. I am simply recounting and sharing my own experiences on this blog. Nothing I express here should be taken as medical advice and you should consult with your doctor before starting any diet or exercise program. I provide nutritional information for my recipes simply as a courtesy to my readers. It is calculated using MacGourmet software and I remove erythritol from the final carb count and net carb count, as it does not affect my own blood glucose levels. I do my best to be as accurate as possible but you should independently calculate nutritional information on your own before relying on them. I expressly disclaim any and all liability of any kind with respect to any act or omission wholly or in part in reliance on anything contained in this website.
Free Bonus: Secrets to Keto Baking!
Sign up for your favorite recipes delivered straight to your inbox plus get our FREE bonus: Secrets to Keto Baking!


I am allergic to coconut and whey. Do you have alternatives to those you could suggest?
Please search for one of my other chocolate cake recipes.
Can you use collagen protein powder instead of whey protein powder
No, it will make the cake very gummy and hard to cook through.
Saw the picture and decided to make it. Presumed it was a loaf pan (doh) and noticed after I poured batter and decided to leave it. It took a bit longer to cook and needed to cover the last 10 minutes but worked out well. I cut it horizontally for layers. Yum.
There is not a single recipe that is not delicious. It is so gratifying to have the opportunity to rely on your recommendations and your recipes, they are all fantastic!
Amazing! Made for Christmas Eve.
Came out a bit dryer because I slightly overbaked. Soaked with espresso and cream before assembling and wow!
Find better when at room temp to serve.
In my go to list for sure!!
Could you use chocolate whey protein powder instead of unflavoured whey?
Sure!
My hubby made this cake for my birthday on Sunday. It was absolutely delicious and so moist and I love the orange and chocolate combo. I think he put in extra orange extract because I love it so much. He did have some extra frosting left over but that’s not a problem lol. Great recipe and he did a fantastic job!
So glad you liked it!
Can I use something in place of the whey? Is it similar to something else?
Egg white protein powder works well.
This cake is simply amazing, and it was really fun to make too! The chocolate orange flavor is delightful, and the cake is so beautiful. I made it as written using the upper amount of orange extract. I had some leftover frosting, so I scooped it into molds and froze it for fat bombs. I baked the cake in an 8×11” pan, so I got a nice, tall layer cake. This cake looks and tastes seriously impressive.